If you've just purchased an InSinkErator Instant Hot Water Dispenser, here are helpful installation instructions.
Watch & Learn
This video shows you how to install an Instant Hot Water Dispenser.
How To Install Instant Hot Water Dispenser
Written Directions
Materials Needed
Before attempting to install your dispenser, read and understand the entire InSinkErator safety and installation instructions listed below. Should you need a PDF manual with instructions, download it here.
Drill
Provided Tool
IMPORTANT
Important installation safety information is provided in the InSinkErator Instant Hot Water Dispenser Installation, Care and Use manual.
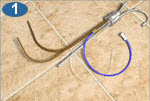
Turn off the water supply. Before starting, turn off the water supply. Then unpack the dispenser faucet and carefully straighten the copper tubing. Keep in mind that each model contains slightly different components. For example, only the Series 1100 models have the filter as a standard component.
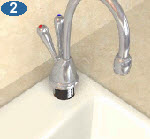
Mount the faucet. You'll first mount the dispenser faucet. Make sure the seal is properly seated on the dispenser/valve body and that it surrounds the sink mounting hole.
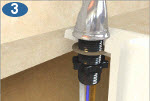
Tighten the faucet. Working from under the sink, place the semi-circular mounting plate on the threaded stud. Attach the hex nut, then, using the tool provided, tighten the nut sufficiently to keep the faucet from rotating.
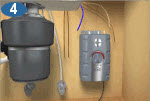
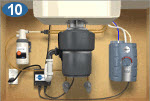
Mount the hot water tank. The next step is to mount the hot water tank. Mount it vertically and level in a location where the plumbing and electrical connections can be made. Do not extend plumbing or electrical lines. Also, allow for drainage from the underside if necessary. Select a spot under the sink to mount tank vertically within reach of both plumbing and electrical connections. The tank should be within 16 inches or less of faucet water lines and within 30 inches or less of a standard grounded outlet. While holding the tank in place on the spot selected for installation, use a pencil to mark locations for 2 hanging screws. Drill two eighth-inch holes for the wood screws. Secure the tank to the wall.
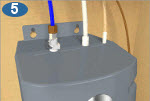
Connect the tubes. Without depressing the gray button, place the snap-connect fitting at the end of the blue 1/4" tube onto the left plastic fitting on the tank, pushing until it clicks into place. Slip the flexible white 7/16" tube over barbed middle fitting and slide down approximately 1/2". Slip the clear 5/16" tube over the far right smooth fitting and slide down approximately 1/2". Visually check for pinched or crimped tubes. Don't plug the tank unit in yet.
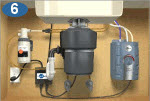
Connect the plumbing. Next, make the plumbing connections. This involves making tubing connections and here you'll find a couple minor variations depending on which system you've purchased. But first let's go through some guidelines that should be followed regardless of system. Make sure that when routing the tubing between components, you keep it from interfering with the cabinet storage area. Avoid sharp bends, leave extra lengths for ease of servicing, then cut the tubing to desired lengths and insert them completely into the quick-connect fittings. When cutting either plastic or copper tubing, care must be taken to remove all burrs that may harm the quick-connect fittings and be sure to insert tubing completely into the quick-connect fittings. To remove, depress the release ring and gently pull out tubing.
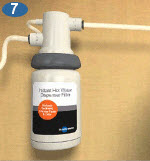
Install the filtration system. If you're installing the F-201 filtration system: First, install the head and filter bracket assembly in such a way that all plumbing connections can be made without stretching or kinking the tube. Also, make sure the mounting location allows for filter cartridge to be replaced. The filter should never be mounted over an electrical outlet. Mark the mounting hole locations and attach the bracket with the screws provided. Next, completely insert the 3/8" polyethylene tubing into the inlet side of the filter head. Do the same with a similar length of tubing into the outlet side of the filter head.
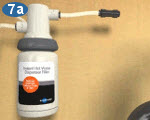
For Hot Only Models: If you are installing the filtration system, you'll now insert the outlet tubing into the quick-connect fitting, and then insert the dispenser faucet copper tube - marked with white tape - into the quick-connect fitting. (See Fig 7a)
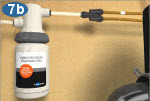
For Hot/Cold Models: If you are installing the filtration system, insert the tubing from the outlet side of the filter head into the quick-connect "Y" fitting. Then insert both dispenser faucet copper tubes - one white taped, one untaped - into the quick-connect "Y" fitting. (See Fig 7b)
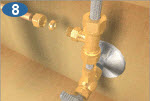
Insert tube into compression fitting. Slide the brass nut and ferrule provided with the control valve over the tube. Insert the tube into the compression fitting and tighten.
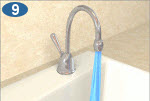
Fill the tank. Without plugging the unit into the electrical outlet, turn on the cold water supply. Then turn the hot faucet handle on and hold it to fill the tank. The tank will fill up and cold water will come out of the faucet. Run the faucet for 3 minutes to flush the system, making sure all connections are watertight.
Install the gasket and rings. Now you can plug in the tank. It will take 10 to 15 minutes for the water to reach its target temperature. YOU MAY EXPERIENCE SOME WATER DRIPPING FROM THE FAUCET DURING THE FIRST HEATING CYCLE. THIS IS NORMAL. SIMPLY TURN ON THE HOT WATER FOR 15 SECONDS AND ALLOW TO REHEAT.
Adjust the temperature. You're ready to go, with near-boiling, hot water at your command. After 24 hours of operation, you may want to adjust the temperature of your hot water. The thermostat is preset at the factory at approximately 200°F. Care must be taken not to allow the water to boil. If this happens, you will experience steam and water dripping from the faucet and extended boiling may harm the unit. Simply adjust the temperature by 1/2 dial-mark increments clockwise to increase the temperature and counterclockwise to decrease the temperature.